Pass Data to Stateless Widget in Flutter

In flutter, Stateless widgets are those widgets that don’t require any change in their state. They are immutable. In order to pass data to a stateless widget, we have to use a constructor. The constructor accepts the data as a parameter and we can use that data in our widget.
class FirstScreen extends StatelessWidget {
  const FirstScreen({Key? key}) : super(key: key);

  @override
  Widget build(BuildContext context) {
    return Scaffold(
      appBar: AppBar(
        title: const Text("First Screen"),
      ),
      body: Padding(
        padding: const EdgeInsets.all(16.0),
        child: ElevatedButton(
          onPressed: () {
            Navigator.push(
              context,
              MaterialPageRoute(
                builder: (context) => const SecondScreen(
                  title: 'Second Screen',
                  description: 'Second Screen Description',
                ),
              ),
            );
          },
          child: const Text('Go to Second Screen'),
        ),
      ),
    );
  }
}

class SecondScreen extends StatelessWidget {
  const SecondScreen({Key? key, required this.title, required this.description}) : super(key: key);

  final String title;
  final String description;

  @override
  Widget build(BuildContext context) {
    return Scaffold(
      appBar: AppBar(
        title: Text(title),
      ),
      body: Padding(
        padding: const EdgeInsets.all(16.0),
        child: Text(description),
      ),
    );
  }
}
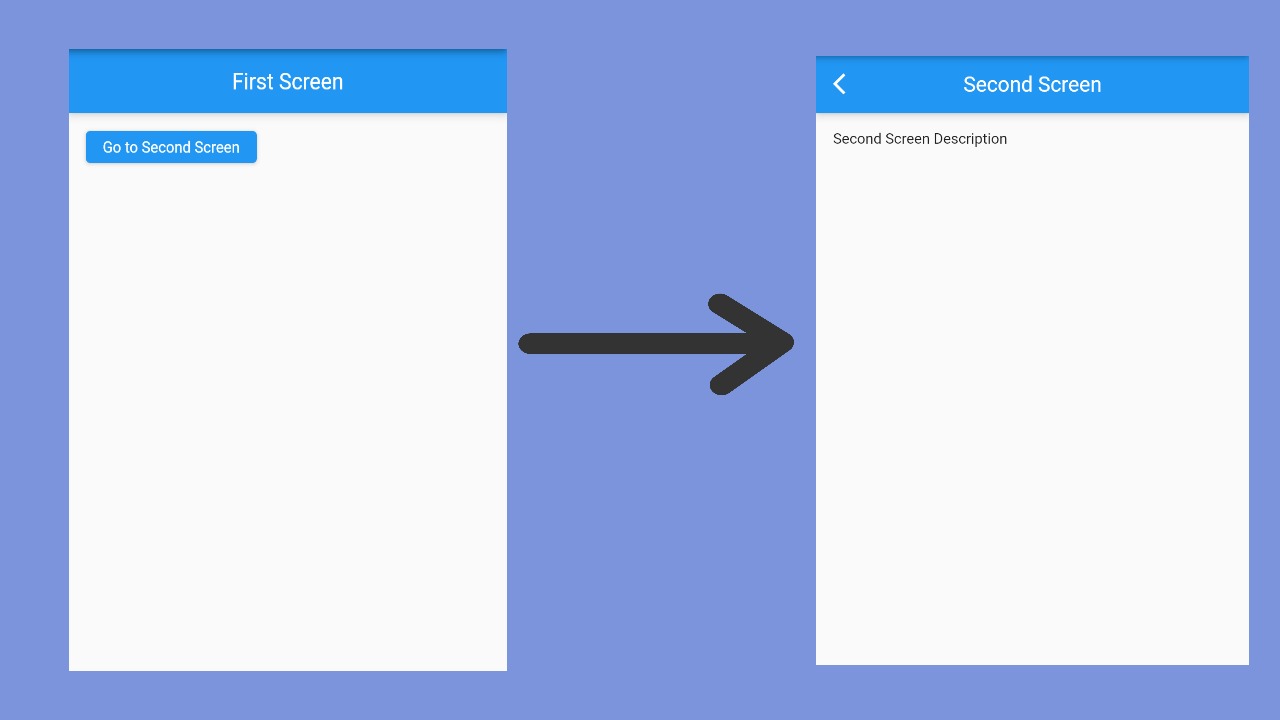
The code example creates two screens. The first screen has a button that, when pressed, navigates to the second screen. We are passing title and description data to the second screen. It will be shown on the Second screen when We click on the button "Go to Second Screen".
Pass List Data to Screen and render the list
In the previous code example, we passed the String type value in the Stateless Widget and then show shown on the screen. Now we will pass a List into the stateless widget and show the items of the list on the new Screen.
import 'package:flutter/material.dart';

void main() => runApp(MyApp());

class MyApp extends StatelessWidget {
  @override
  Widget build(BuildContext context) {
    return MaterialApp(
      title: 'Flutter App',
      debugShowCheckedModeBanner: false,
      theme: ThemeData(
        primarySwatch: Colors.blue,
      ),
      home: HomeScreen(),
    );
  }
}

class Fruit {
  String? fruitName;
  int? quantity;

  Fruit({this.fruitName, this.quantity});
}

class HomeScreen extends StatelessWidget {
  HomeScreen({Key? key}) : super(key: key);

  final List<Fruit> _fruitList = [
    Fruit(fruitName: 'Apple', quantity: 30),
    Fruit(fruitName: 'Banana', quantity: 50),

  ];

  @override
  Widget build(BuildContext context) {
    return Scaffold(
      appBar: AppBar(
        title: const Text("First Screen"),
      ),
      body: Padding(
        padding: const EdgeInsets.all(16.0),
        child: ElevatedButton(
          onPressed: () {
            Navigator.push(
              context,
              MaterialPageRoute(
                builder: (context) => FruitsScreen(
                  fruitList: _fruitList
                ),
              ),
            );
          },
          child: const Text('Show fruit list'),
        ),
      ),
    );
  }
}

class FruitsScreen extends StatelessWidget {
  const FruitsScreen({Key? key, required this.fruitList}) : super(key: key);

  final List<Fruit> fruitList;

  @override
  Widget build(BuildContext context) {
    return Scaffold(
      appBar: AppBar(
        title: const Text("Fruit List"),
      ),
      body: ListView.builder(
        itemCount: fruitList.length,
        itemBuilder: (BuildContext context, int index) {
          return ListTile(
            leading: const Icon(Icons.list),
            title: Text(fruitList[index].fruitName ?? ''),
          );
        },
      ),
    );
  }
}- Simple stateless widget in Flutter
- Add border to widget in Flutter
- Create stateful widget in Flutter
- Add a single widget as a sliver in Flutter
- Center Row widget children vertically and horizontally Flutter
- Add spacing between characters of Text widget Flutter
- Convert text of Text widget to uppercase or lowercase in Flutter
